When your loofah sponge has served its purpose in the bathroom or kitchen, don't toss it in the trash. Instead, give it a second life as sustainable garden mulch. Using loofah as mulch is an innovative way to reduce waste while nourishing your garden with natural, biodegradable material that contributes to waste reduction and breaks down into valuable organic matter.
This comprehensive guide explores everything you need to know about using loofah fiber mulch in your garden, from preparation methods to application techniques and the best plants to pair with this eco-friendly material.
Recommended Garden Supplies

PIUH Complete Goat Milk Soap Making Kit
All-in-one soap making kit with goat milk base, molds, dried flowers, and essential tools. Ideal starter kit for beginners wanting to create loofah soap bars.
Check Price on Amazon
PURA D'OR Organic Essential Oils Set (16 Scents)
Complete aromatherapy set with 16 USDA organic essential oils including lavender, eucalyptus, and tea tree. Perfect for scenting loofah soap and bath bombs.
Check Price on AmazonAs an Amazon Associate, we earn from qualifying purchases.
Benefits of Using Loofah as Mulch
Loofah mulch offers numerous advantages for sustainable gardening, making it an attractive alternative to traditional mulching materials like wood chips or straw. Understanding these benefits helps explain why mulching in permaculture systems often incorporates natural fibers like loofah.
- 100% Biodegradable: Loofah is a natural plant fiber that breaks down completely without leaving synthetic residues
- Waste Reduction: Extends the lifecycle of loofah sponges instead of sending them to landfills
- Carbon Neutral: As it decomposes, loofah returns nutrients to the soil without contributing to greenhouse gases
- Renewable Resource: Unlike peat moss or bark, loofah can be grown annually in your garden
- No Dyes or Chemicals: Natural loofah is free from harmful additives found in some commercial mulches
- Moisture Retention: Loofah's spongy structure holds water exceptionally well, reducing irrigation needs
- Weed Suppression: A 2-3 inch layer blocks light and prevents weed germination
- Soil Temperature Regulation: Insulates soil, keeping it cooler in summer and warmer in winter
- Nutrient Release: As it decomposes, loofah adds organic mulch material and trace minerals to soil
- Improved Soil Structure: Breaks down into humus that enhances soil aeration and drainage
- Lightweight: Won't compact soil or smother delicate plant roots

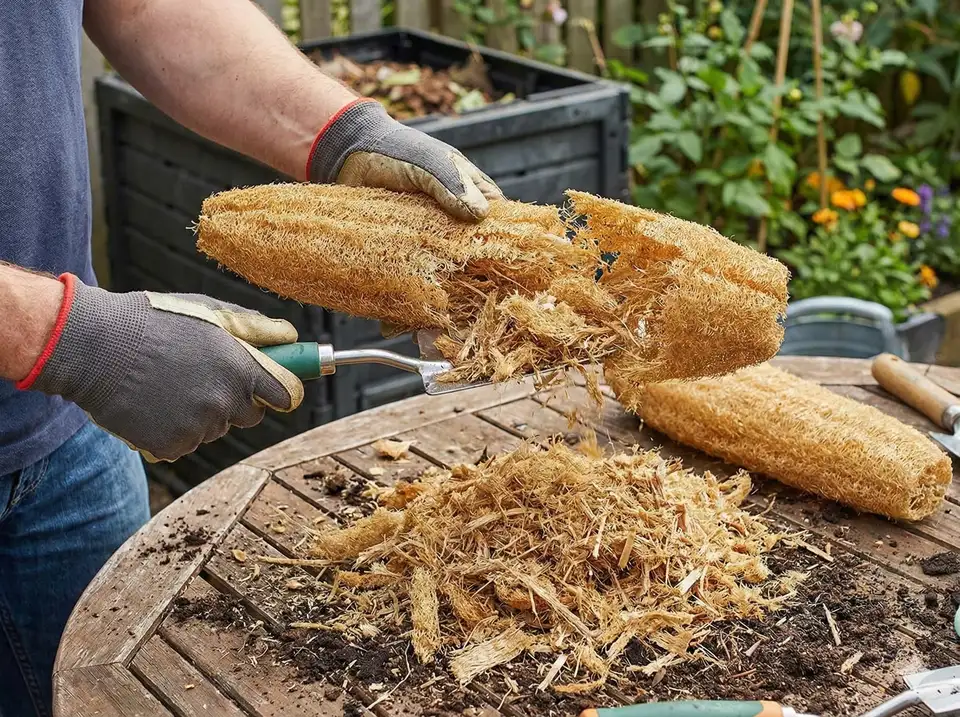
How to Prepare Loofah for Garden Mulch
Proper preparation ensures your loofah mulch is clean, safe, and ready to benefit your garden. You can also incorporate scraps from using processing scraps when preparing sponges for other uses. Follow these steps to transform old sponges into effective natural garden mulch.
Step-by-Step Preparation
- Clean Thoroughly: If using bath sponges, rinse well with water to remove soap residue. For kitchen sponges, ensure no food particles remain.
- Optional Sanitization: Soak in a solution of 1 part white vinegar to 3 parts water for 30 minutes, then rinse. This kills any bacteria or mold.
- Dry Completely: Air dry sponges in direct sunlight for 1-2 days to prevent mold during storage.
- Cut or Shred: Use garden shears, scissors, or a machete to cut loofah into 1-3 inch pieces. For larger quantities, a wood chipper works well.
- Size Variation: Mix different sizes - larger chunks (2-3 inches) for long-lasting coverage, smaller pieces (1 inch) for faster decomposition.
- Storage: Store prepared mulch in a dry location in breathable bags until ready to use.
- Avoid Bleached Sponges: Natural, unbleached loofah is best for garden use to avoid introducing chemicals to your soil
- Composting First: For heavily soiled sponges, consider composting loofah for 2-3 months before using as mulch
- Combine Sources: Mix old bath sponges with fresh garden-grown loofah for optimal texture and decomposition rates
- Harvesting Fresh: If growing your own, harvest mature brown gourds, remove seeds, and peel outer skin before shredding
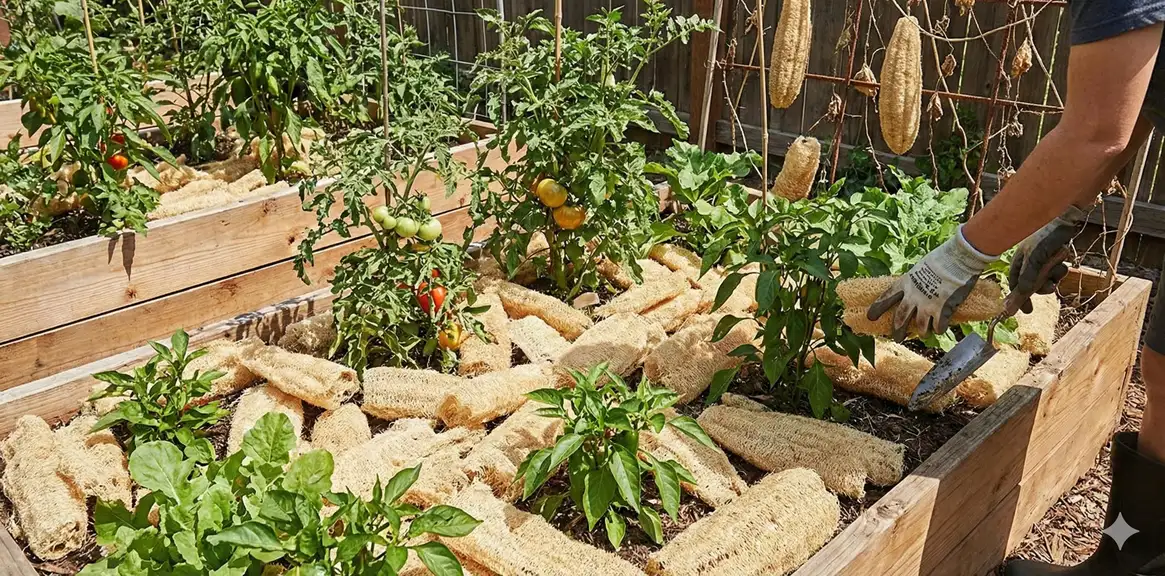
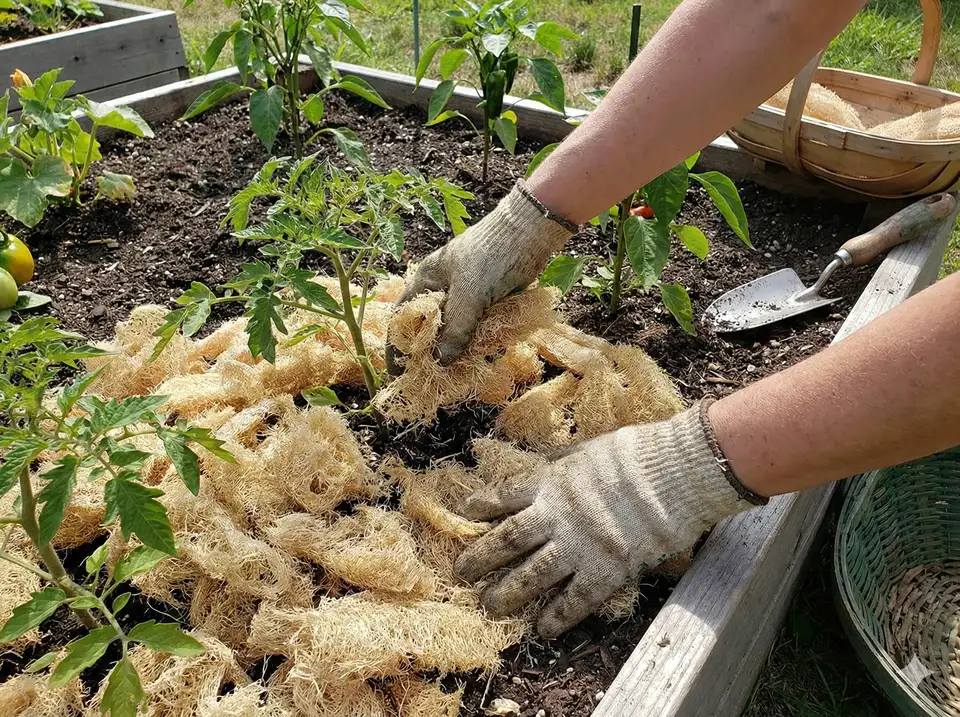
Application Methods for Loofah Mulch
Applying loofah mulch correctly maximizes its benefits and ensures long-lasting performance in your garden beds.
Basic Application Technique
- Depth: Apply a 2-3 inch layer around plants; avoid piling against stems or trunks
- Coverage Area: Spread mulch in a circle extending to the plant's drip line
- Timing: Best applied in spring after soil warms or in fall before winter
- Soil Preparation: Water soil thoroughly before applying mulch, and weed the area first
- Spacing: Leave a 2-3 inch gap around plant stems to prevent moisture-related diseases
- Replenishment: Add fresh layers every 4-6 months as the material decomposes
Advanced Application Strategies
Customize your loofah mulch application based on specific garden needs when mulching around plants:
- Layered Approach: Start with cardboard or newspaper as a weed barrier, then top with loofah mulch
- Companion Mulching: Mix loofah with other organic materials like leaves or straw for enhanced benefits
- Pathway Mulching: Use coarser loofah pieces on garden paths for drainage and weed control
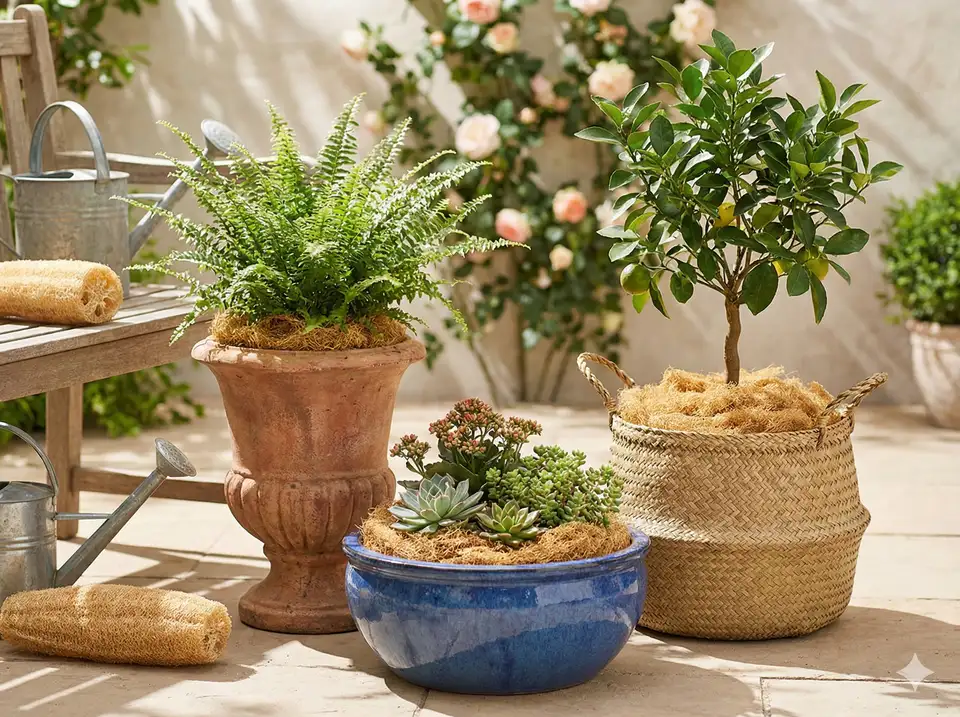
- Container Gardens: Top-dress potted plants with fine loofah pieces for moisture retention
- Vegetable Garden Rows: Apply between rows to reduce soil splash and prevent disease transmission
Best Plants for Loofah Mulch
While loofah mulch benefits most garden plants, certain species particularly thrive with this moisture-retentive, nutrient-rich material.
| Plant Type | Why Loofah Mulch Works Well | Application Notes |
|---|---|---|
| Moisture-Loving Vegetables | Tomatoes, cucumbers, squash benefit from consistent moisture retention | Apply 3-inch layer; replenish monthly during growing season |
| Leafy Greens | Lettuce, spinach, kale enjoy cooler soil temperatures | Use finer pieces for even coverage; 2-inch depth |
| Berry Bushes | Strawberries, blueberries love acidic decomposition | Wide coverage area; refresh after harvest |
| Ornamental Flowers | Roses, hydrangeas benefit from weed suppression and nutrients | Keep away from crown; 2-3 inch depth |
| Tropical Plants | Philodendrons, ferns appreciate high humidity from loofah | Mix with peat moss for extra moisture retention |
| Root Vegetables | Carrots, beets enjoy improved soil structure as mulch decomposes | Apply after seedlings emerge; 2-inch layer |
Combining Loofah with Other Mulches
Mixing loofah fiber mulch with other organic materials creates customized blends that maximize specific benefits for different garden situations.
Ratio: 60% wood chips, 40% shredded loofah
Benefits: Wood chips provide longevity while loofah adds moisture retention. Ideal for perennial beds and shrub borders.
Application: Layer wood chips first (2 inches), then top with loofah (1 inch) for enhanced water-holding capacity.
Ratio: 50% loofah, 50% finished compost
Benefits: Compost adds immediate nutrients while loofah provides structure and moisture control. Perfect for vegetable gardens.
Application: Mix thoroughly and apply 3-inch layer around heavy-feeding plants like tomatoes and peppers.
Ratio: 70% straw, 30% loofah
Benefits: Straw provides bulk coverage while loofah enhances moisture retention. Economical for large garden areas.
Application: Mix and apply 3-4 inch layer; excellent for pathways and annual vegetable beds.
Maintaining Loofah Mulch
Keep your loofah mulch performing optimally with these simple maintenance practices throughout the growing season.
- Monthly Inspection: Check mulch depth and add material where it has thinned or decomposed
- Fluffing: Occasionally stir or rake loofah mulch to prevent matting and improve air circulation
- Weed Control: Remove any weeds promptly before they establish roots through the mulch layer
- Moisture Monitoring: Water through the mulch; it will absorb and slowly release moisture to plants
- Seasonal Refresh: Top up with fresh loofah mulch in spring and fall as material decomposes
- End-of-Season: Till decomposed loofah into soil in fall to enrich organic content for next season
Common Issues and Solutions
Address these potential challenges to ensure your loofah mulch remains effective and beneficial.
Cause: Fine pieces or excessive moisture causing fibers to mat together.
Solution: Mix in coarser materials like wood chips or periodically fluff with a rake. Ensure proper drainage in the area.
Cause: High temperatures, abundant moisture, or very fine pieces accelerating breakdown.
Solution: Use larger chunks (2-3 inches), apply thicker layers (3-4 inches), or combine with slower-decomposing materials like wood chips.
Cause: Extremely dry loofah mulch repelling water initially, or matted surface layer.
Solution: Pre-wet mulch before application, use drip irrigation under mulch layer, or break up surface crust with gentle raking.
Frequently Asked Questions
Loofah mulch typically lasts 4-6 months before fully decomposing. The breakdown rate depends on environmental conditions like moisture, temperature, and microbial activity. In hot, humid climates, it may decompose in 3-4 months, while in cooler, drier conditions it can last up to 8 months.
Both fresh and old loofah sponges work as mulch. Old, worn-out bath sponges are perfect for giving them a second life, but you can also use freshly processed loofah from your garden. Fresh sponges may take slightly longer to begin decomposing but offer the same benefits.
Loofah mulch generally does not attract pests when properly prepared and applied. Unlike some organic mulches that can harbor insects, the fibrous structure of loofah doesn't provide an ideal habitat for most pests. Ensure the loofah is clean and free of soap residue before use.
For mulch purposes, aim for pieces ranging from 1-3 inches in size. Larger chunks (2-3 inches) last longer and provide better weed suppression, while smaller pieces (1 inch or less) decompose faster and integrate into soil more quickly. A mix of sizes often works best for balanced benefits.
Loofah mulch has a neutral to slightly acidic pH (6.0-7.0) and will not significantly alter your soil's pH. As it decomposes, it adds organic matter without dramatically shifting pH levels, making it safe for most plants and garden types.