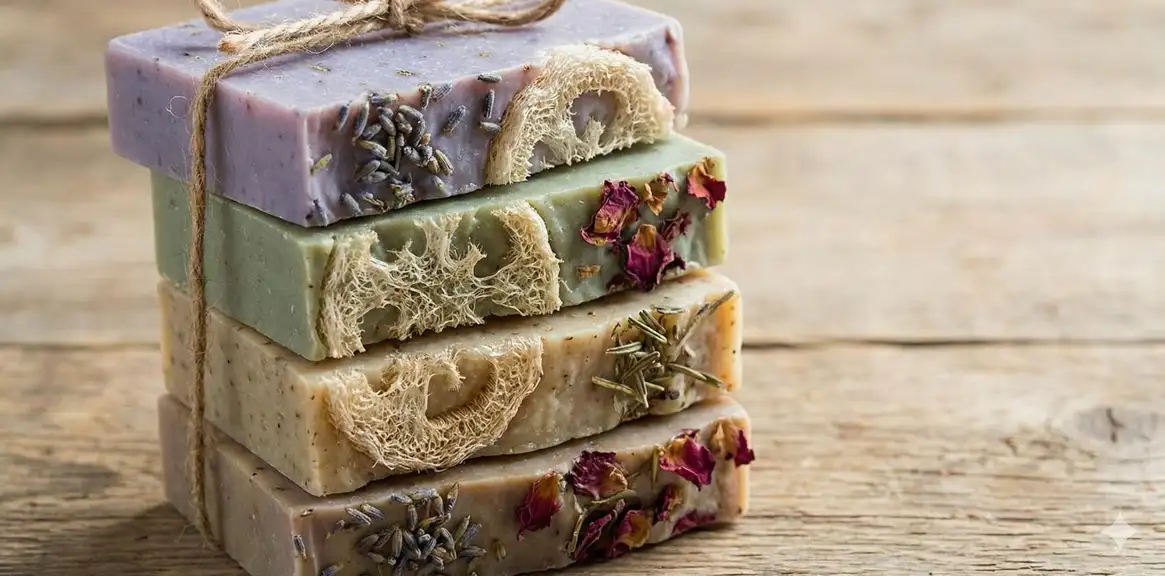
Making your own loofah soap bars is a rewarding craft that combines natural exfoliation with personalized skincare. Whether you're creating handmade gifts or building a sustainable bath routine, embedded loofah soap provides gentle exfoliation while the soap cleanses and moisturizes. For more loofah craft ideas, explore our complete DIY projects guide.
This comprehensive guide covers everything from choosing the right loofah to mastering both beginner-friendly melt-and-pour methods and advanced cold process techniques. You'll learn how to cut loofah perfectly, select quality soap bases, add natural colors and scents, and package your finished bars beautifully.
Essential Supplies for Loofah Soap Making
Before you begin making loofah soap, gather these essential materials. Having everything prepared makes the process smoother and more enjoyable.
Recommended Soap Making Supplies
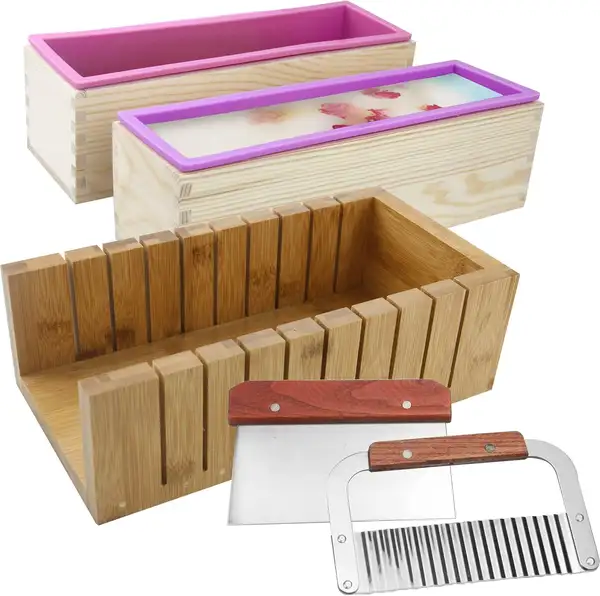
Professional Silicone Soap Molds with Cutters (2-Pack)
Create perfectly shaped loofah soap bars with these professional-grade silicone molds. Includes wavy and straight cutters for customized soap designs.
Check Price on Amazon
Premium Shea Butter Soap Base (10 lbs)
Premium melt-and-pour soap base enriched with shea butter for extra moisturizing properties. Perfect for embedding loofah slices in luxurious, skin-nourishing bars.
Check Price on Amazon
PIUH Complete Goat Milk Soap Making Kit
All-in-one soap making kit with goat milk base, molds, dried flowers, and essential tools. Ideal starter kit for beginners wanting to create loofah soap bars.
Check Price on Amazon
Rolio Mica Powder Colorants for Soap Making
Vibrant, skin-safe mica powder set for coloring handmade soaps. Create beautiful swirls and layers in your loofah soap bars with these cosmetic-grade pigments.
Check Price on AmazonAs an Amazon Associate, we earn from qualifying purchases.
- Dried loofah sponges: Natural, processed loofahs without chemicals or dyes
- Soap base: Glycerin, shea butter, goat milk, or olive oil varieties
- Molds: Silicone or plastic soap molds (rectangle, oval, or round shapes)
- Sharp knife: Serrated bread knife works best for cutting loofah
- Microwave-safe bowl: For melting soap base (or double boiler)
- Spray bottle with rubbing alcohol: For removing bubbles
Optional Enhancements
- Essential oils: Lavender, tea tree, eucalyptus, peppermint (10-15 drops per pound)
- Natural colorants: Mica powder, natural clays, spirulina, turmeric
- Dried botanicals: Calendula petals, lavender buds, rose petals
- Skin-loving additives: Honey, oatmeal, coffee grounds, vitamin E oil

How to Cut and Prepare Loofah for Soap
Properly preparing your loofah is crucial for creating beautiful, functional soap bars. The thickness and quality of your loofah slices directly impact the final product's appearance and exfoliating properties. Before starting, you'll want to prepare loofah for embedding by ensuring it's fully dried and cleaned.
- Select quality loofah: Choose fully dried, natural loofahs without bleaching or chemical treatments. The loofah should be firm but not brittle.
- Remove seeds and debris: Shake out any remaining seeds from inside the loofah. Trim off damaged ends.
- Cut to desired thickness: Using a serrated knife, cut the loofah into slices 1/2 inch to 1 inch thick. Thinner slices provide gentler exfoliation.
- Optional whitening: To lighten loofah for soap, soak in diluted hydrogen peroxide solution for 30 minutes, then dry completely.
- Use a sawing motion rather than pressing down to prevent crushing the fibers
- Cut slightly larger than your mold if the loofah will be centered in the soap
- Save smaller pieces and scraps for confetti-style soaps
- Work over a trash bag or newspaper to catch the fiber debris

Melt-and-Pour Loofah Soap Method
The melt-and-pour method is perfect for beginners and anyone wanting quick results without handling lye. This technique produces beautiful loofah soaps ready to use within hours.
- Prepare your workspace: Place loofah slices in molds. For best results, position them vertically or at an angle.
- Cut soap base: Dice 1-2 pounds of melt-and-pour base into 1-inch cubes for faster, more even melting.
- Melt the base: Microwave in 30-second intervals, stirring between each, until completely melted (about 2-3 minutes total).
- Add enhancements: Once melted, remove from heat and add essential oils, colorants, or additives. Stir gently.
- Check temperature: Allow soap to cool to about 130-140°F before pouring.
- Pour over loofah: Slowly pour melted soap into molds, ensuring it saturates the loofah completely.
- Remove bubbles: Spritz surface with rubbing alcohol to eliminate air bubbles.
- Cool and unmold: Let soap harden at room temperature for 2-4 hours. Pop out and use immediately.

- Glycerin (Clear): Shows off loofah beautifully, gentle on skin, budget-friendly
- Shea Butter: Extra moisturizing, creamy lather, opaque white appearance
- Goat Milk: Creamy, nourishing, excellent for sensitive skin
- Olive Oil: Very gentle, naturally moisturizing, creates a soft bar
Cold Process Loofah Soap Method
Cold process soap making offers complete control over ingredients but requires more time, skill, and safety precautions. This advanced method produces artisanal-quality bars with a 4-6 week curing period.
Safety First: Always wear safety goggles and gloves when handling lye. Work in a well-ventilated area and never add water to lye (always add lye to water).
Basic Recipe (2 lb batch):
- 16 oz olive oil
- 10 oz coconut oil
- 6 oz palm oil or shea butter
- 4.5 oz lye (sodium hydroxide)
- 10.5 oz distilled water
- Loofah slices cut to fit molds
- Mix lye solution: Carefully add lye to water. Set aside to cool to 100-110°F.
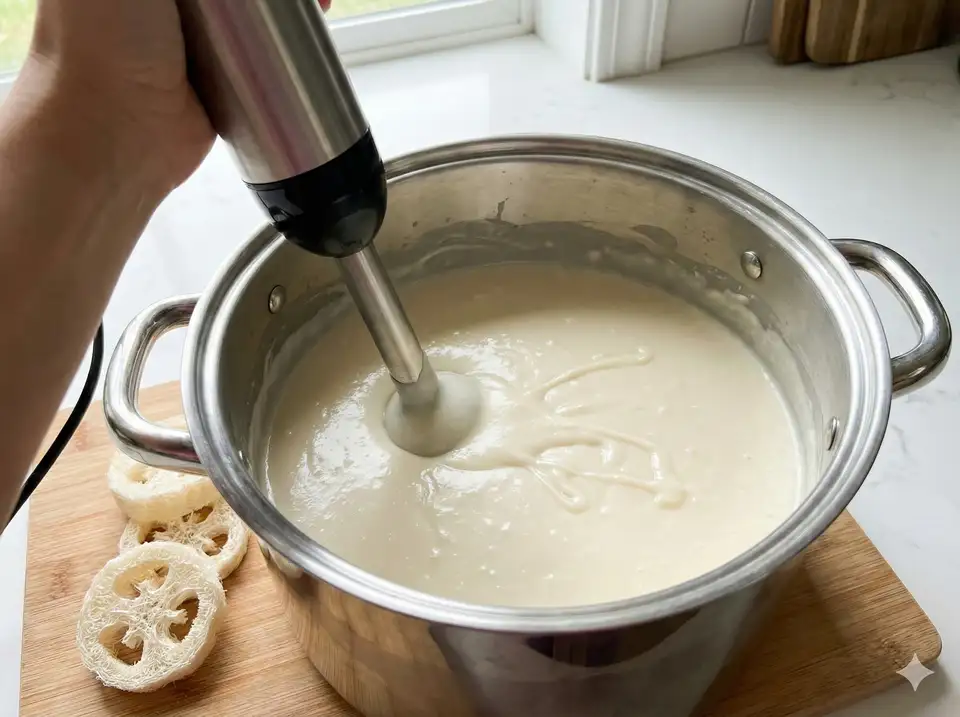
- Melt oils: Combine oils in large pot and heat to 100-110°F.
- Combine: When both reach target temperature, slowly pour lye solution into oils.
- Blend to trace: Use stick blender to mix until pudding-like consistency.
- Add fragrance: Stir in essential oils quickly but thoroughly.
- Pour and insert loofah: Pour half into molds, place loofah slices, pour remaining soap over top.
- Insulate and cure: Cover molds and wrap in towels. Let sit 24-48 hours, then unmold.
- Cure bars: Place on drying rack for 4-6 weeks before use.
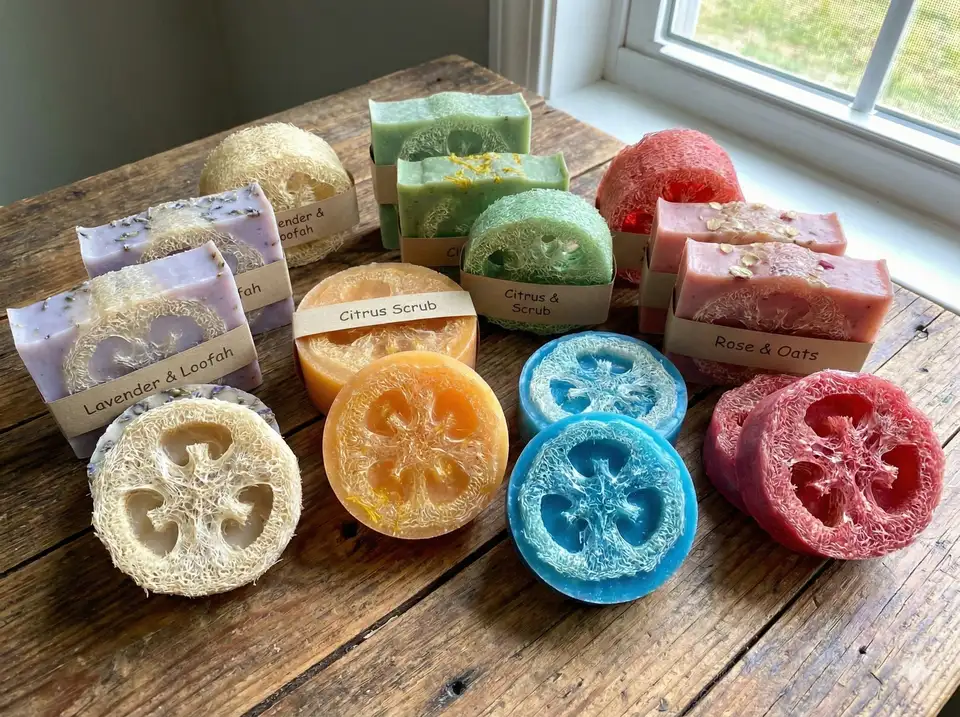
Customizing Your Loofah Soap Bars
Personalize your loofah soaps with natural colors, beneficial additives, and appealing scents to create unique bars for every preference and skin type.
Natural Colorants
- Pink/Red: Rose clay, beetroot powder, madder root
- Orange: Carrot powder, turmeric, paprika
- Yellow: Calendula, turmeric, yellow Brazilian clay
- Green: Spirulina, chlorella, French green clay
- Blue/Purple: Indigo powder, purple Brazilian clay
Popular Essential Oil Blends
- Energizing Morning: Peppermint + eucalyptus + rosemary
- Relaxing Evening: Lavender + chamomile + ylang ylang
- Spa Luxury: Lemongrass + tea tree + bergamot
- Citrus Burst: Sweet orange + grapefruit + lemon
Curing Time and Proper Storage
Proper curing and storage ensures your loofah soaps remain fresh, hard, and effective for months. Once complete, you'll enjoy using loofah soap bars in your daily routine.
Melt-and-Pour Soaps
- Initial hardening: 2-4 hours at room temperature
- Ready to use: Immediately after unmolding
- Shelf life: 6-12 months when properly stored
- Storage: Wrap individually in plastic wrap to prevent moisture absorption
Cold Process Soaps
- Unmolding: 24-48 hours after pouring
- Minimum cure time: 4 weeks
- Optimal cure: 6-8 weeks for hardest, longest-lasting bars
- Shelf life: 12+ months, improves with age up to 1 year
Creative Packaging Ideas for Loofah Soap
Beautiful packaging transforms homemade loofah soap into gift-worthy items. Consider including your creations in handmade soap in gift sets or giving as soap as sustainable gifts for eco-conscious friends.
Eco-Friendly Packaging Options
- Kraft paper wrapping: Wrap bars in brown kraft paper tied with natural twine
- Muslin bags: Small drawstring bags in natural cotton or linen
- Beeswax wraps: Sustainable, reusable alternative to plastic wrap
- Wooden soap boxes: Small hinged boxes for premium presentation
- Create spa gift sets with loofah soap, bath salts, and natural washcloth
- Bundle 2-3 different scented soaps in a decorative basket
- Add dried lavender or rose petals to packaging for visual appeal
- Include a care card with usage tips and ingredient benefits
If you're interested in selling handmade soap, invest in professional-looking labels and consider your branding carefully.
Frequently Asked Questions
Melt-and-pour loofah soap lasts 6-12 months when stored properly in a cool, dry place. Cold process loofah soap can last 12+ months and actually improves with age during the first year. In the shower, expect each bar to last 4-6 weeks with daily use, similar to regular soap. The loofah portion maintains its exfoliating properties throughout the life of the soap.
No, always use fully dried loofah for soap making. Fresh or partially dried loofah contains moisture that can cause mold growth and spoil the soap. Harvest loofahs when mature, remove skin and seeds, then dry for 2-3 weeks until completely hard and lightweight. Only dried loofah has the fibrous structure needed for exfoliation.
Not necessarily. For sensitive skin, use thinner loofah slices (1/4-1/2 inch), choose gentle soap bases like goat milk or shea butter, and avoid adding additional exfoliants. Use the soap with gentle circular motions rather than scrubbing vigorously. Many people with sensitive skin enjoy mild loofah soap for gentle exfoliation 2-3 times per week.
Yes, but requirements vary by location. In the US, soap that makes no cosmetic or medicinal claims is generally exempt from FDA cosmetic regulations, but you must still follow labeling requirements (ingredient list, net weight, business info). Check your local and state regulations for business licensing, sales tax, and insurance requirements.