If you're in USDA zones 5, 6, or 7, you might think loofah growing is impossible. After all, this tropical vine needs 150-200 days to produce mature sponges, and your frost-free season is much shorter. But with the right techniques, cold-climate gardeners across the northern U.S. and Canada are successfully harvesting homegrown loofahs every year.
This guide shares proven strategies from gardeners who've cracked the code on growing loofah in challenging climates. You'll learn exactly when to start seeds, which season-extending tools actually work, and what to realistically expect from your harvest.
Essential Cold-Climate Growing Tools
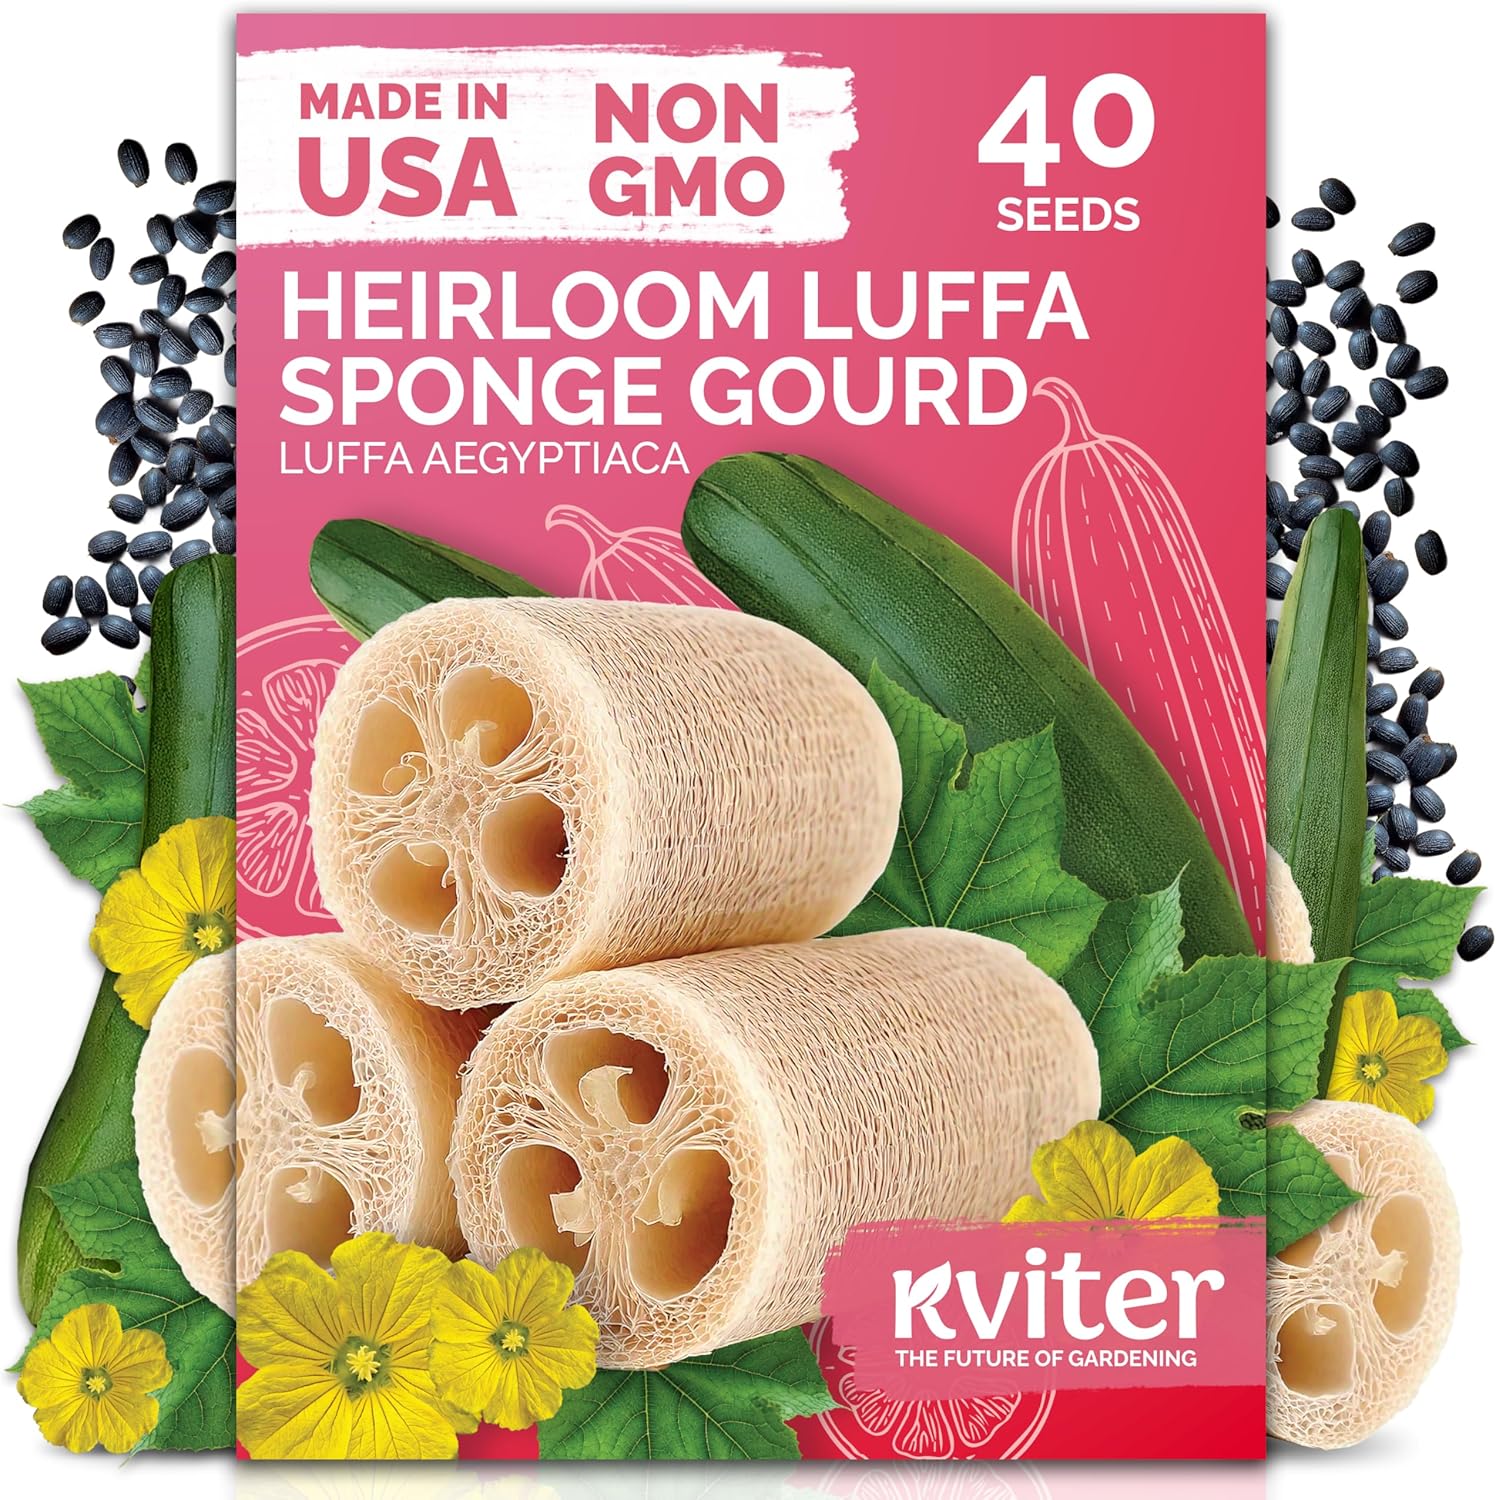
KVITER Heirloom Luffa Seeds (40 Count)
Fast-sprouting non-GMO seeds with 90%+ germination - grow your own natural sponges in one season
Buy on Amazon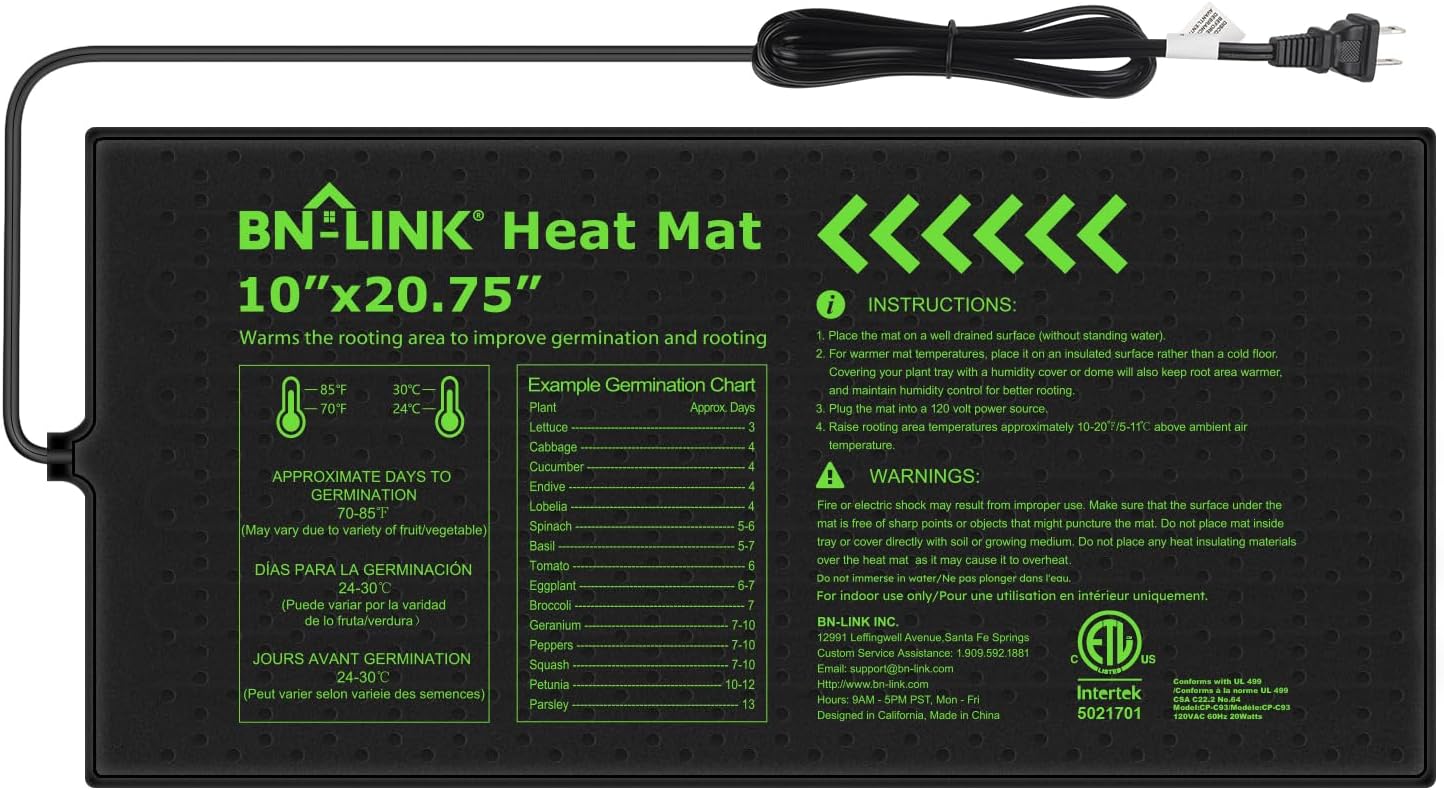
BN-LINK Seedling Heat Mat for Faster Germination
Cuts loofah germination time in half - waterproof design maintains optimal 75-85°F soil temperature
Buy on AmazonUnderstanding the Cold-Climate Challenge
Loofah (Luffa aegyptiaca) is native to tropical Asia and thrives in long, hot summers. The core challenge for cold-climate growers is simple math: loofah needs 150-200 frost-free days, but northern zones often have far fewer.
Zone 5
Most Challenging
90-110 frost-free days
Zone 6
Moderate Challenge
110-130 frost-free days
Zone 7
Manageable
130-150 frost-free days
The good news? With strategic planning, you can effectively "extend" your growing season by 4-6 weeks at each end. That puts even zone 5 gardeners in the realm of possibility.
- Zone 5-6 growers may only harvest 3-6 mature sponges per plant (vs. 10-20 in warm climates)
- Some loofahs may not fully mature on the vine and will need to finish indoors
- You'll need to invest more time and possibly money in season extenders
- Not every year will be successful - cold springs or early frosts can ruin crops
Starting Seeds Extra Early
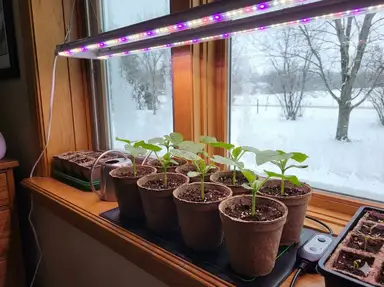
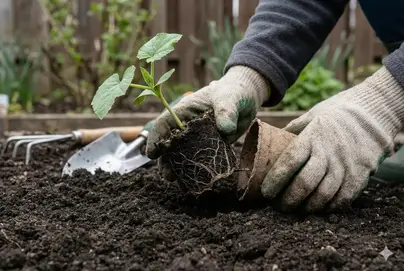
The most critical step for cold-climate success is starting seeds indoors well ahead of your last frost date - earlier than you would in warm climates. While zone 8+ gardeners might start 4-6 weeks before transplanting, you'll want 8-10 weeks of indoor growing time.
| Zone | Start Seeds Indoors | Last Frost (Typical) | Transplant |
|---|---|---|---|
| Zone 5 | Late February - Early March | May 15-30 | Late May - Early June |
| Zone 6 | Mid-March | April 30 - May 15 | Mid to Late May |
| Zone 7 | Late March - Early April | April 15-30 | Early to Mid May |
- Use heat mats: Keep soil temperature at 75-85F for fastest germination
- Provide strong light: 14-16 hours daily under grow lights (south-facing window usually isn't enough)
- Large containers: Start in 4" pots or larger; loofahs don't like root disturbance
- Up-pot if needed: Move to gallon containers if plants outgrow pots before transplant time
- Harden off gradually: Start 2 weeks before transplanting with increasing outdoor time
Season Extension Techniques

Season extenders are non-negotiable for cold-climate loofah growing. These tools add precious weeks to your growing season and protect plants from late spring and early fall frosts.
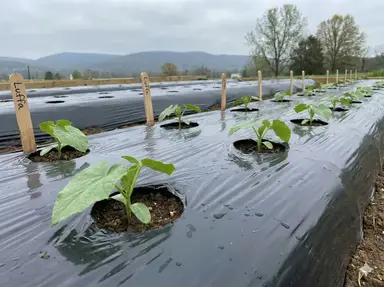
Black Plastic Mulch
This is perhaps the single most effective tool for cold-climate growers. Black plastic absorbs solar heat and transfers it to the soil.
- Effect: Raises soil temperature by 5-10F and speeds root growth
- Installation: Lay 2-3 weeks before transplanting to pre-warm soil
- Best practice: Cut X-shaped slits for planting; leave in place all season
- Bonus: Suppresses weeds and conserves moisture
Row Covers & Low Tunnels
Lightweight fabrics that protect plants while allowing light and water through.
- Floating row cover: Light fabric (1.5 oz) adds 4-8F protection
- Low tunnels: Hoops + plastic create mini-greenhouses; can add 10-15F
- Spring use: Protect transplants for first 3-4 weeks after planting
- Fall use: Cover plants when frost threatens to extend harvest
- Venting: Open or remove on warm days (80F+) to prevent overheating
Wall O' Waters & Cloches
Water-filled devices that absorb heat during the day and release it at night.
- Wall O' Water: Water-filled tubes protect to 16F - essential for early transplanting
- Installation: Place around transplants 1-2 weeks before typical planting date
- Duration: Remove when vines outgrow them (usually 4-6 weeks)
- DIY alternative: Water-filled 2-liter bottles arranged around plants
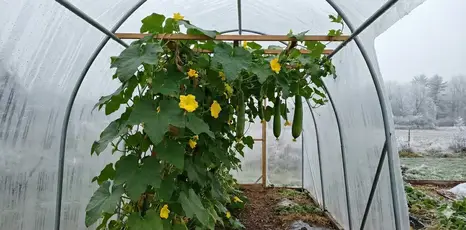
Cold Frames & High Tunnels
For dedicated growers willing to invest in permanent structures.
- Cold frame: Glass or plastic-topped box; best for hardening off seedlings
- High tunnel (hoop house): Walk-in structure; can extend season by 6-8 weeks total
- Note: Loofahs need vertical space; ensure adequate height for trellising
Choosing the Right Microclimate
Your yard likely has microclimates - small areas that are warmer or cooler than the surroundings. For loofah, you want the warmest spot possible.
- South-facing location: Maximizes sun exposure; gets warmest earliest in spring
- Near a wall or fence: Dark surfaces absorb and radiate heat
- Protected from wind: Cold winds dramatically reduce effective temperature
- Slightly elevated: Cold air settles in low spots; avoid frost pockets
- Near concrete/pavement: Thermal mass holds heat into evening
If you don't have an ideal spot, you can create one. Build a trellis against a south-facing wall, or use a fence to block prevailing winds. Every degree helps.
Cold-Climate Growing Timeline
Here's a typical timeline for zone 6 growers. Adjust by 1-2 weeks earlier for zone 5, or 1-2 weeks later for zone 7.
| When | Activity | Details |
|---|---|---|
| Mid-March | Start Seeds Indoors | Use heat mats and grow lights. Soak seeds 24-48 hours first. |
| Early April | Prepare Garden Bed | Lay black plastic mulch. Install trellis. Set up Wall O' Waters. |
| Mid-April | Begin Hardening Off | Gradually expose seedlings to outdoor conditions over 2 weeks. |
| Late April - Early May | Transplant with Protection | Plant inside Wall O' Waters or under row covers. Soil should be 60F+. |
| Late May | Remove Season Extenders | After consistent warm weather, remove covers. Begin training vines. |
| July-August | Flowering & Fruit Set | Hand-pollinate if needed. Maintain consistent watering and feeding. |
| Late August | Pinch Growing Tips | Stop new growth to direct energy to maturing fruit. |
| September-October | Frost Protection & Harvest | Cover plants on frost nights. Harvest mature loofahs before killing frost. |
Care Adjustments for Cold Climates
Beyond season extension, cold-climate plant care differs from standard recommendations in several ways:
| Care Aspect | Warm Climate | Cold Climate Adjustment |
|---|---|---|
| Watering | 1-2 inches weekly | Less frequent; cool soil stays moist longer. Use warm water. |
| Fertilizing | Monthly balanced | Lighter doses; slower growth needs less. Focus on quick-release. |
| Pruning | Minimal | More aggressive. Remove suckers early; focus energy on main vines. |
| Fruit Thinning | Optional | Essential. Remove late-set fruit that won't mature. |
| End of Season | Let dry on vine | May need to harvest green and finish indoors. |
Harvesting in Short Seasons
In cold climates, you may not have the luxury of waiting for loofahs to fully dry on the vine before frost arrives.
Harvesting Mature Loofahs
- Signs of maturity: Skin turns brown, feels light, seeds rattle inside
- Process normally: Follow our processing guide
- Best quality: Vine-dried loofahs have the best fiber structure
Finishing Green Loofahs Indoors
If frost threatens before your loofahs mature:
- When to harvest green: Before killing frost (28F or below)
- Size requirement: Must be full-size (at least 12" long); small ones won't develop fibers
- Indoor method: Hang in warm, dry location (garage, basement) for 2-4 weeks
- Signs it's ready: Skin turns tan/brown, feels lighter, may wrinkle
- Alternative: Soak in water until skin softens, then peel immediately
See our green loofah guide for more options.
- Getting even 3-5 mature loofahs is a win in zones 5-6!
- Cold-climate loofahs can be just as good quality as southern-grown
- Each year you'll learn what works for your specific conditions
- Save seeds from your earliest-maturing fruits for future years
Variety Selection Tips
Not all loofah varieties perform equally in cold climates. Consider these factors when choosing seeds:
- Luffa aegyptiaca (smooth loofah): Generally matures faster than ridged types
- "Short" varieties: Smaller fruit matures faster
- Seeds from northern growers: May be adapted to shorter seasons
- Avoid: Extra-long or "giant" varieties that need maximum growing time
Container Growing Option
Growing loofah in moveable containers offers unique cold-climate advantages: you can start outdoors earlier by moving pots to sheltered spots during the day, and bring plants inside during late-season cold snaps.
Container Size
15-20 gallon minimum; use wheeled plant dollies
Placement
Against south-facing wall on patio; move to garage on frost nights
Trellis
Use wall-mounted or portable trellis system
Season Extension
Can gain 2-3 weeks at each end by moving containers
Common Cold-Climate Mistakes
- Starting seeds too late: You can't make up lost time; start early even if it means extra indoor care
- Transplanting into cold soil: Wait until soil is 60F+, even if using protection
- Removing protection too early: One late frost can set plants back weeks
- Letting too many fruit set: In short seasons, fewer fruit = better quality
- Not preparing for fall frost: Have row covers ready; check forecasts daily
- Giving up after one bad year: Weather varies; try again with lessons learned
What to Realistically Expect
Here's honest feedback from cold-climate growers:
| Zone | Typical Harvest | Success Rate |
|---|---|---|
| Zone 5 | 2-5 sponges per plant | 60-70% (with season extension) |
| Zone 6 | 4-8 sponges per plant | 75-85% (with season extension) |
| Zone 7 | 6-12 sponges per plant | 85-95% |
Even if you only harvest a few loofahs, there's satisfaction in growing this tropical plant where it "shouldn't" grow. Plus, homegrown loofahs make wonderful gifts - especially when you can tell friends you grew them yourself in a cold climate!
Frequently Asked Questions
Yes, but it's challenging. You'll need to start seeds indoors in late February, use aggressive season extension (Wall O' Waters, row covers), and may only harvest 2-5 mature sponges. Some years may fail completely due to late springs or early frosts.
If they're full-size (12"+), harvest them and hang indoors in a warm, dry place for 2-4 weeks. The fibers will continue developing as long as the fruit was mature enough. Small, immature fruit won't develop usable fibers.
Not necessary, but helpful. You can succeed with simpler season extenders like black plastic mulch, Wall O' Waters, and row covers. However, a greenhouse or high tunnel makes everything easier and more reliable.
It can help, especially in cooler, wetter summers when pollinator activity is lower. Hand-pollinating also ensures fruit sets early in the season, giving more time for maturation. See our pollination guide for techniques.